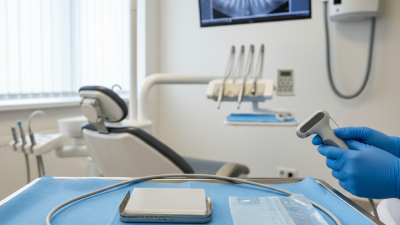
7 Schick Dental Sensor Buying Tips
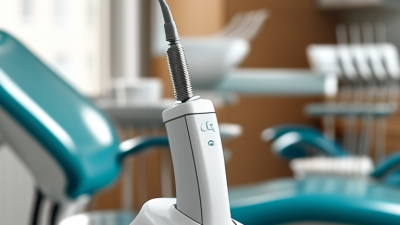
Choosing a schick dental sensor is not merely a comparison of prices, pixel sizes, and warranty periods. It affects diagnostic confidence, patient comfort, chairside speed, and long-term operating costs. A sensor that feels awkward in a child’s mouth may slow an entire appointment. A fragile cable can create an expensive interruption.
The global dental imaging market was valued at approximately USD 3.3 billion in 2023, according to Fortune Business Insights, with continued growth expected through 2032. That expansion reflects wider adoption of digital imaging, but market growth does not guarantee a wise purchase. The U.S. Food and Drug Administration emphasizes proper device use, quality assurance, and radiation-safety practices for dental imaging equipment. In practical terms, buyers should examine image quality, active-area size, software compatibility, ergonomics, durability, service response, and total ownership cost.
A useful principle from oral and maxillofacial radiologist Stuart C. White is: “The objective of radiographic examination is to obtain the maximum diagnostic information with the minimum radiation exposure.” This principle should guide every schick dental sensor decision, even when marketing claims appear impressive. Specifications alone can mislead. Real clinical workflow matters more.
The seven tips ahead focus on details that are easy to overlook, including sensor thickness, positioning aids, USB reliability, image-processing controls, and replacement policies. Some recommendations may seem obvious. They are still frequently missed. A perfect sensor does not exist; the right choice depends on your patients, staff, software, and daily appointment pressure. Careful comparison is worthwhile. Small design differences can become visible at every bitewing, periapical image, and retake.

Match Sensor Size to Clinical Use: Sizes 0–2 Cover Different Patient Needs
Choosing the right intraoral sensor size can improve positioning, comfort, and diagnostic consistency. Sizes 0, 1, and 2 serve different clinical situations.
Size 0
suits small mouths, young children, and selected anterior images. Its compact surface reduces pressure on delicate tissues.
Size 1
offers a useful middle ground for narrow arches and anterior examinations. It can be easier to position when a size 2 feels bulky.
Size 2
provides broader coverage for adult posterior images and bitewings. It often captures more teeth in one exposure, reducing retakes.
Fit matters. A sensor that is too large may trigger gagging, movement, or an incomplete image. A sensor that is too small may miss distal surfaces or require additional exposures. In practice, patient anatomy matters more than age alone. A small adult mouth may need size 1, while an older child may tolerate size 2. Check the arch width, the target area, and the patient’s comfort before positioning.
Do not rely on habit. I have seen otherwise careful positioning fail because the sensor choice was automatic. That is worth reconsidering. Use a holder designed for the selected size, keep the receptor parallel when possible, and confirm coverage before exposure. Reviewing a few early images can reveal whether your current size choice supports consistent diagnostic detail.
Compare Image Quality: 15–30 μm Pixels and 12–16-Bit Grayscale Depth
When comparing dental sensors, start with the image, not the brochure. Pixel size between 15 and 30 μm can affect edge detail, root outlines, and small carious areas. Smaller pixels may reveal finer structures, but they can also expose motion blur and positioning errors. Resolution alone is not diagnostic quality.
Grayscale depth matters too. A 12-bit sensor records 4,096 shades, while a 16-bit sensor records 65,536. More levels can support subtle contrast changes in bone and soft tissue. However, real performance depends on noise control, exposure stability, and software processing. A higher bit count cannot rescue a poorly captured image.
Tip:
Request sample images taken at similar exposure settings. Inspect enamel edges, periodontal spaces, and low-contrast regions. Ask who captured them and under what conditions.
Tip:
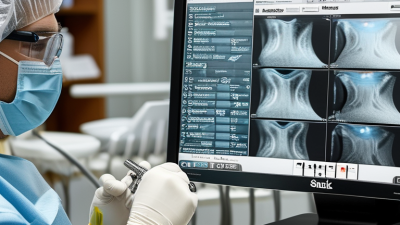
Check images on the monitor used in daily practice. A sensor may look impressive in a demonstration, yet less useful under ordinary lighting. That gap deserves attention.
From hands-on evaluation, comfort and positioning still influence results. A technically advanced sensor becomes frustrating if patients cannot tolerate its thickness. Compare active area, cable flexibility, and repeat-image rates. I would also ask for service records and realistic warranty terms. My own preference has changed after seeing excellent specifications produce inconsistent clinical images. Numbers help, but repeatable evidence matters more.
Verify Compliance: IEC 60601-1, ISO 10993, and FDA 510(k) Status
When buying a dental sensor, verify compliance before comparing image resolution or price. IEC 60601-1 addresses electrical safety, including insulation, leakage current, and protection against shock. Ask for the current test report, certificate, and exact model number. A generic declaration is not enough. Details matter.
Tip:
Match every document to the sensor you will receive. Check whether accessories, cables, and the connected imaging system are included in the evaluation. ISO 10993 covers biological safety for materials that may contact patients. Request the relevant biocompatibility evidence, especially for the sensor housing and protective barrier interface. A missing document should trigger a pause, not a guess.
Tip:
Confirm the FDA 510(k) status through official records, using the precise product name, manufacturer, and clearance number. “FDA registered” does not mean the device is cleared for marketing. Review the cleared indications and compare them with your intended clinical use. In practice, distributors sometimes provide outdated files. I have seen small naming differences create unnecessary uncertainty. That is a flaw worth investigating. Keep copies of the documents, record your questions, and ask for written clarification before purchase.
Evaluate Compatibility: USB, TWAIN, and Imaging-Software Integration
Compatibility should be checked before comparing image resolution or sensor size. Start with the USB connection. Confirm the required port type, cable length, power needs, and driver support for your computers. A sensor may connect physically but still fail during image capture.
TWAIN support can simplify communication between the sensor and dental imaging software. However, “TWAIN compatible” does not guarantee a smooth workflow. Ask whether the driver supports your operating system and preferred capture settings. Request a live demonstration using your actual computer. Test exposure, image transfer, patient-file matching, and retakes. Small delays become frustrating during a busy appointment schedule.
Software integration deserves careful attention. Confirm whether images open directly inside the patient record or require manual exporting. Check support for common file formats, image rotation, calibration, and diagnostic tools. In practice, I would test several sensors in the same operatory. USB hubs, older drivers, and security settings can cause unexpected interruptions. I once overlooked a cable limitation, and the setup became awkward near the chair. That mistake changed my checklist. Also ask about driver updates and technical support after installation. A reliable purchase is not only plug-and-play; it should remain usable when computers, software, or clinical routines change.
Calculate Ownership Cost: Warranty, Sterilization, Repairs, and 3–5-Year Use
A dental sensor’s purchase price is only the visible part of ownership cost. Over three to five years, calculate protective sleeves, positioning holders, cleaning supplies, software fees, shipping, and staff training. A low-cost sensor may become expensive when accessories require frequent replacement.
Read the warranty carefully. Check its duration, accidental-damage limits, exclusions, and repair turnaround time. A sensor sitting in a service center can delay examinations and reduce daily productivity. Ask whether temporary replacement equipment is available. Also confirm who pays for shipping and technical diagnosis.
Sterilization needs special attention. Many sensors require barrier protection and surface disinfection rather than heat sterilization. Follow the manufacturer’s instructions exactly, because unsuitable chemicals or excessive moisture can damage connectors. Keep a simple cleaning log. It helps identify repeated failures and supports warranty discussions.
Estimate realistic repair risk. Divide the expected service cost by the number of planned operating years, then add a small downtime allowance. My early spreadsheet was too optimistic; it ignored staff time and interrupted appointments. A better review includes actual repair history, cable wear, connector damage, and the sensor’s daily workload. Ask one more question: can your team maintain the device consistently during a busy afternoon? That answer may matter more than a modest discount.
7 Schick Dental Sensor Buying Tips — Calculate Ownership Cost: Warranty, Sterilization, Repairs, and 3–5-Year Use
| Tip |
Buying Decision |
What to Verify |
Planning Benchmark |
3-Year Cost |
5-Year Cost |
| 1 |
Compare the complete purchase price |
Include the sensor, interface or cable, positioning accessories, installation, staff training, and applicable taxes. A low initial price may exclude required accessories. |
$4,200
one sensor setup |
$4,200 |
$4,200 |
| 2 |
Check warranty coverage |
Confirm coverage period, accidental-damage exclusions, cable coverage, labor, shipping, loaner availability, and whether the warranty remains valid after approved disinfection. |
24 months
included in base case |
$0
assumed included |
$0
assumed included |
| 3 |
Calculate sterilization and infection-control cost |
Use only the cleaning, disinfection, barrier, or sterilization method permitted in the sensor’s instructions. Do not assume that a sensor is autoclavable unless explicitly approved. |
$0.35 per use
3,960 uses/year |
$4,158 |
$6,930 |
| 4 |
Budget for repairs after warranty |
Ask about typical turnaround time, diagnostic fees, cable replacement, accidental damage, and the cost of a replacement sensor. Set aside a reserve after the included warranty ends. |
6% of purchase price/year
after month 24 |
$252 |
$756 |
| 5 |
Account for backup capacity and downtime |
Determine whether the practice needs a backup sensor or temporary loaner. Include shipping, staff idle time, retakes, and delayed patient appointments when estimating downtime exposure. |
$150 per year
downtime reserve |
$450 |
$750 |
| 6 |
Estimate useful life and residual value |
Plan around handling frequency, drops, cable strain, cleaning compliance, software compatibility, and expected replacement timing. A used sensor may have little resale value after heavy clinical use. |
10% residual value
at year 3; none assumed at year 5 |
−$420 |
$0 |
| 7 |
Compare 3-year and 5-year ownership cost |
Use total ownership cost rather than purchase price alone. Compare the result with expected image volume, replacement risk, workflow disruption, and the cost of adding a second sensor. |
3-year / 5-year view |
$8,640
$2.91 per use |
$12,636
$2.55 per use |
| Estimated Total Ownership Cost |
$8,640 |
$12,636 |
Calculation assumptions:
One sensor; 18 clinical uses per day; 220 operating days per year; 3,960 uses annually; barrier and approved infection-control consumables cost $0.35 per use; repair reserve begins after a 24-month warranty; downtime reserve is $150 per year; no financing, tax, software subscription, or replacement purchase is included.
The figures are planning benchmarks and should be replaced with the written quotation, warranty terms, approved reprocessing instructions, and actual utilization of the dental practice.
Formula:
Total Ownership Cost = Purchase Price + Sterilization/Barrier Cost + Repair Reserve + Downtime Reserve − Residual Value